
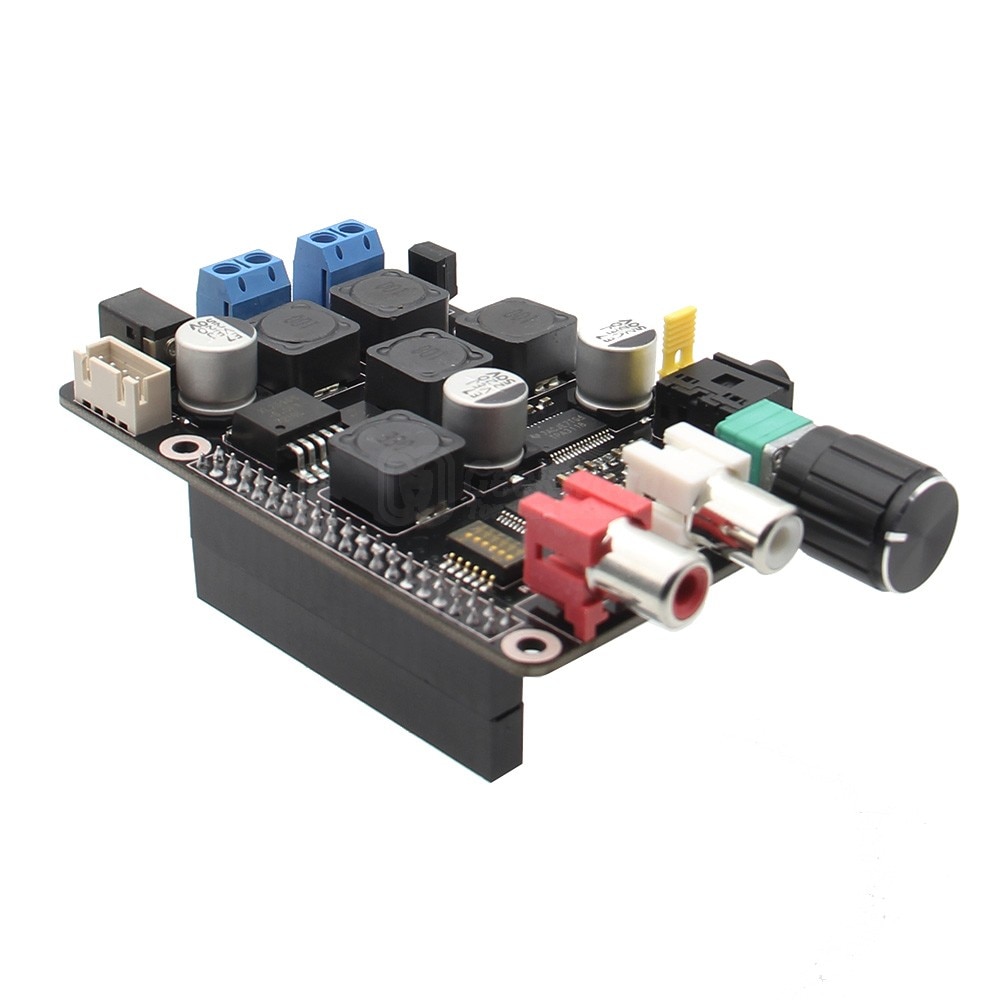
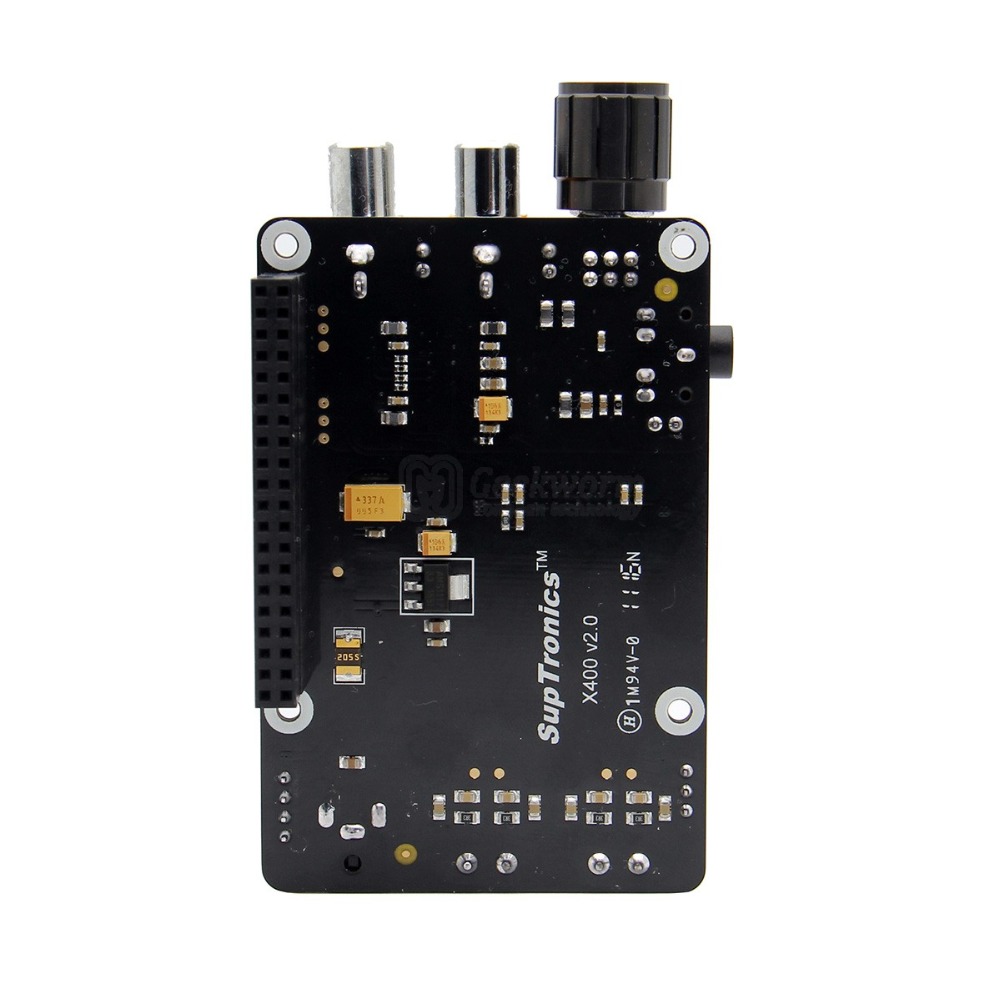
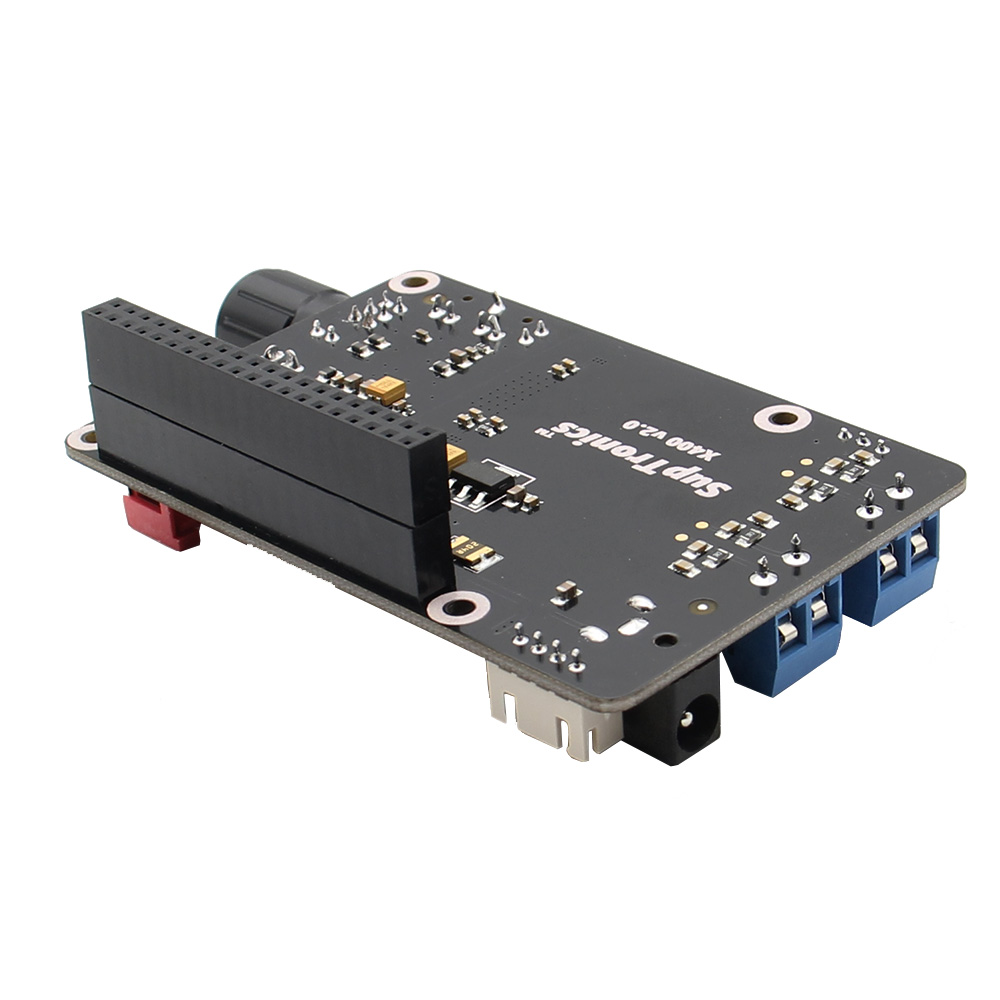


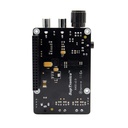


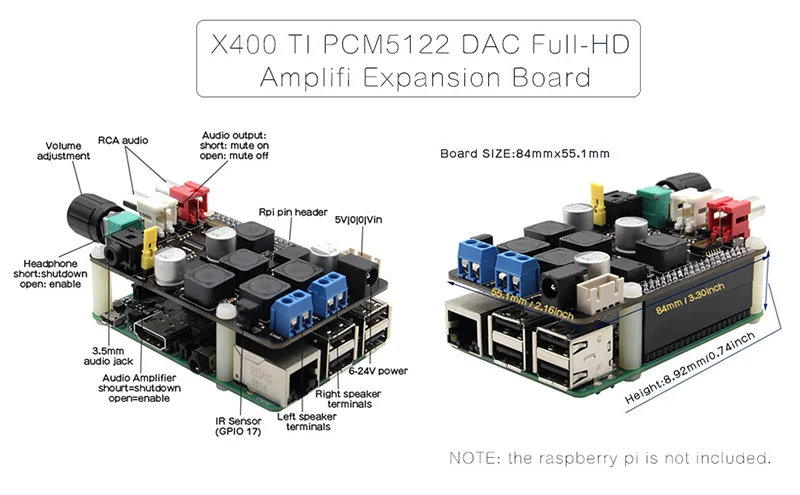
Raspberry Pi DAC Full-HD Class-D Amplifier I2S PCM5122 X400 Audio Expansion Board
Categories :
Raspberry Pi AccessoriesSKU :
180957100% original guarantee
Return within 30days
Worldwide Fast delivery
You may also like
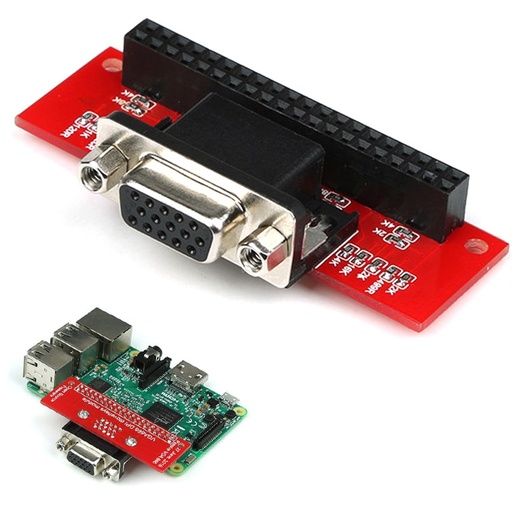
VGA 666 Adapter Board For Raspberry Pi 3B / 2B / B+ / A+
$ 5.29 $ 5.29
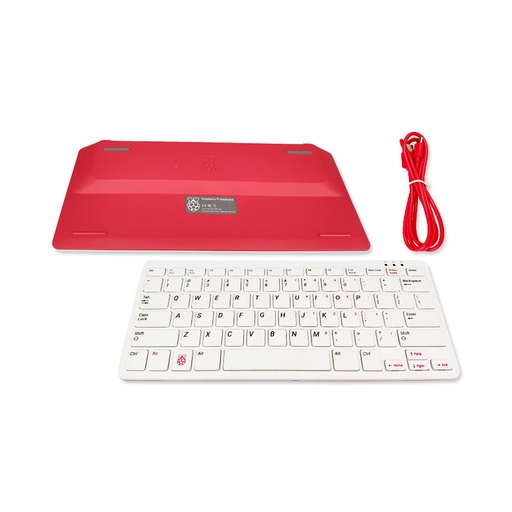
Raspberry Pi keyboard White-Red
$ 23.38 $ 23.38
Raspberry Pi 3 Model B+ Transparent Acrylic Case
$ 0.91 $ 0.91
[Packing List]
Note: This is the newest version of X400 Audio Expansion Board.
Bundle 1:
- 1 x Expansion board
- 1 x Pack of plastic screws
- 2 x Jumper cap
Bundle 2: Bundle 1 + 19V 2A EU Power supply
Note: 1/the raspberry pi is not included. 2/ Power supply specification: Input Voltage: 100-240V AC, Output Voltage: 19V DC, 2A, DC Jack: 5.5x2.5mm, Frequency: 50/ 60Hz.
[Operating System]
- Raspbian Jessie / Volumio ...etc
- For Use With RASPBERRY PI 3 B+ (B Plus) / Pi 3 Model B / PI 2 MODEL B / PI 1 MODEL B+
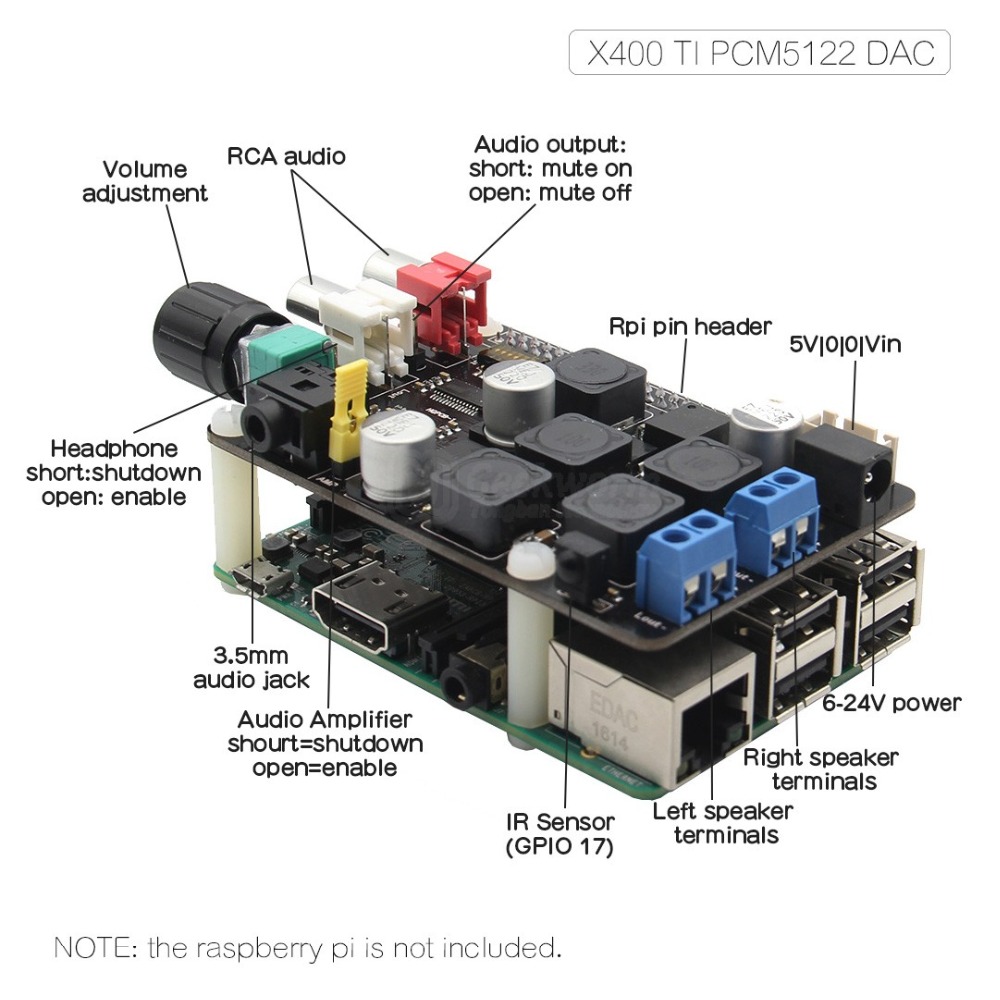
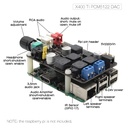
[Audio]
- Full-HD audio – up to 24-bit/192kHz playback
- Class leading audio; 112db SNR, and THD of 0.0019%
- Audiophile TI Burr Brown 32-bit/384kHz DAC (TI PCM5122)
- Uses the digital I2S audio signals to reduce CPU load over USB audio solutions
- Integrated hardware volume control
- Mute can be enabled / disabled via jumper
- Built in High quality audio headphone amplifier (TI TPA6133A)
- Earphone AMP can be enabled / disabled via jumper
- Built in High quality Class-D stereo audio amplifier (TI TPA3118D2)
- Up to 2 x 20W into 4 ohm
- AMP can be enabled / disabled via jumper
- Phono/RCA connectors
- 3.5mm stereo audio jack
- Speaker terminals
[Wireless]
- Built in IR sensor (38KHz)
[Misc]
- Power output socket
- DIP switch to remove connection from RPi’s pin header
- Directly connected on top of the Raspberry Pi using the board GPIO header pins
- No wiring nor soldering is required
[Specification]
- Suitable for Raspberry Pi Model B+ and Raspberry Pi 2 Model B , Raspberry Pi 3 Model B !
- 6V to 24Vdc converted to 5V, 3A via step-down DC/DC converter to power the Raspberry Pi
- 84 x 55.1mm/3.30x2.16inch (Same size as Raspberry Pi)
[Power supply]
X400 expansion board supplies the RPi with a regulated +5V through the GPIO header using a 2A poly-resettable (PTC) fuse. With the wide voltage input range (6~24vdc), the RPi can be powered from a wide variety of external sources such as batteries, power adapters, solar battery sources, etc.
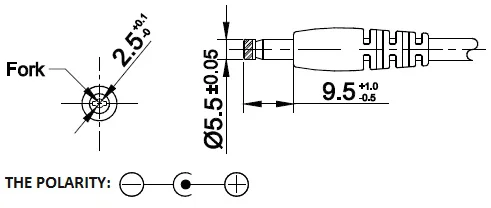
Recommended Power Adapter : 110~240VAC input, 18 ~ 22VDC 2A output
Dimension of input plug (Unit: mm)
Note:
X400 expansion board can be used with the X5000 board / X5000k power supply, please refer to :
WARNING: DO NOT APPLY POWER TO YOUR RASPBERRY PI VIA THE PI’s MICRO USB SOCKET.

[CONFIGURING VOLUMIO]
<1> Select the “System” menu

<2> Select IQaudIO DAC Plus under “Activate I2S driver”. Then reboot and you’re done.

[CONFIGURING RASPBIAN JESSIE]
Version : March 2016
Release date : 2016-03-18
Kernel version : 4.1
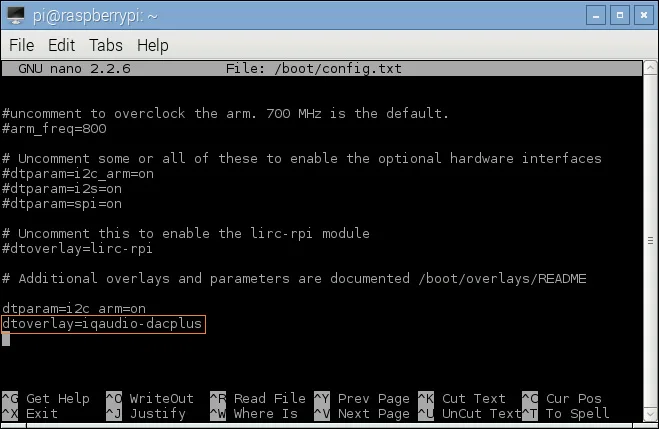
<1> To ensure that the necessary kernel modules are loaded at boot, ensure your /boot/config.txt file has the entry below …
pi@raspberrypi ~ {0}nbsp; sudo nano /boot/config.txt
dtoverlay=iqaudio-dacplus
<2> You must enable i2C support for the X400 to operate. On the Raspberry Pi check if you have the following file and if so delete the line containing i2c-bcm2708 and sndsoc-pcm512x.
pi@raspberrypi ~ {0}nbsp; sudo nano /etc/modprobe.d/raspi-blacklist.conf
Delete or comment out the lines containing the text below if it exists
blacklist i2c-bcm2708
blacklist snd-soc-pcm512x
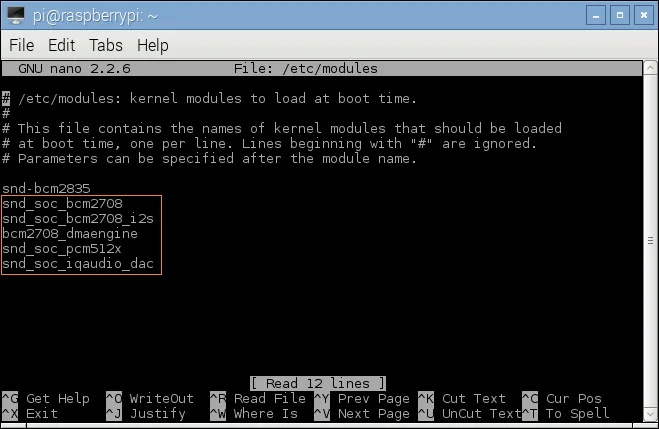
<3> To ensure that the necessary kernel modules are loaded at boot, ensure your /etc/modules file looks the same as below…
pi@raspberrypi ~ {0}nbsp; sudo nano /etc/modules
snd_soc_bcm2708
snd_soc_bcm2708_i2s
bcm2708_dmaengine
snd_soc_pcm512x
snd_soc_iqaudio_dac
<4> Flush your filesystem changes and reboot the Raspberry Pi
pi@raspberrypi ~ {0}nbsp; sync
pi@raspberrypi ~ {0}nbsp; sudo reboot
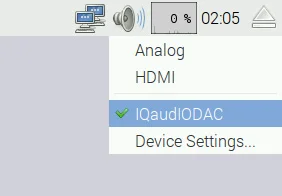
<5> Using your mouse to right click the icon of speaker and select "IQaudioDAC"
<6> Installing LIRC
pi@raspberrypi ~ {0}nbsp; sudo apt-get install lirc
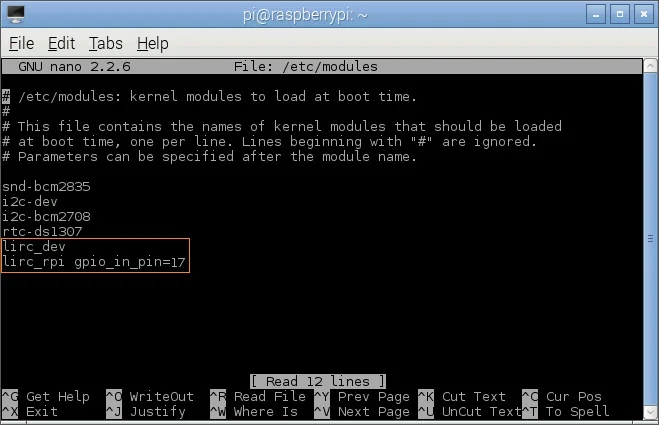
<7> Add the two lines below to /etc/modules . This will start the modules up on boot. Pin 8 bellow will be used to take the output from the IR sensor.
pi@raspberrypi ~ {0}nbsp; sudo nano /etc/modules
lirc_dev
lirc_rpi gpio_in_pin=17
<8> Save your changes by pressing Ctrl-x then Y
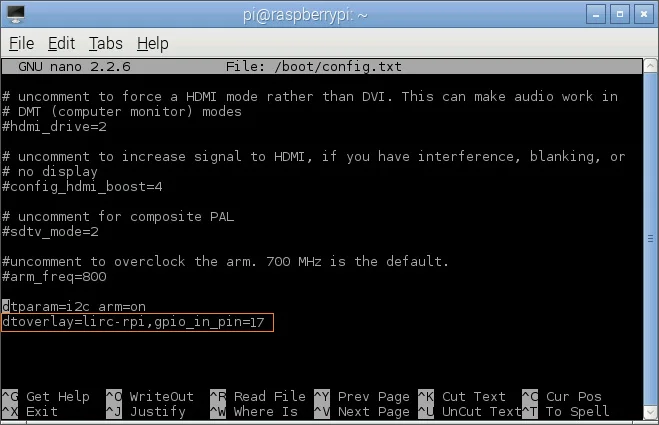
<9> If you are using 3.18.x RaspberryPi firmware you must modify one additional file for the lirc-rpi kernel extension to be loaded:
Edit your /boot/config.txt file
pi@raspberrypi ~ {0}nbsp; sudo nano /boot/config.txt
and add:
dtoverlay=lirc-rpi,gpio_in_pin=17
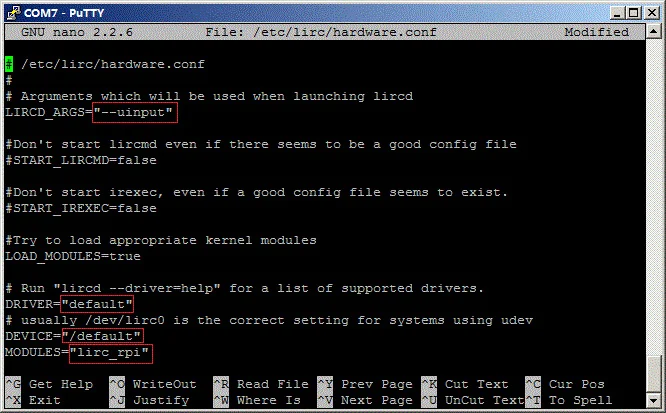
<10> Edit /etc/lirc/hardware.conf and have it appear exactly as shown below.
pi@raspberrypi ~ {0}nbsp; sudo nano /etc/lirc/hardware.conf
# /etc/lirc/hardware.conf
#
# Arguments which will be used when launching lircd
LIRCD_ARGS="--uinput"
# Don't start lircmd even if there seems to be a good config file
# START_LIRCMD=false
# Don't start irexec, even if a good config file seems to exist.
# START_IREXEC=false
# Try to load appropriate kernel modules
LOAD_MODULES=true
# Run "lircd --driver=help" for a list of supported drivers.
DRIVER="default"
# usually /dev/lirc0 is the correct setting for systems using udev
DEVICE="/dev/lirc0"
MODULES="lirc_rpi"
# Default configuration files for your hardware if any
LIRCD_CONF=""
LIRCMD_CONF=""
<10> Edit /etc/lirc/hardware.conf and have it appear exactly as shown below.
pi@raspberrypi ~ {0}nbsp; sudo nano /etc/lirc/hardware.conf
The highlighted text are the parts that will need changing, though it’s worth checking the rest of the text incase you have a different initial configuration.
<11> Save your changes by pressing Ctrl-x then Y
<12> Reboot the Raspberry Pi
pi@raspberrypi ~ {0}nbsp; sudo reboot
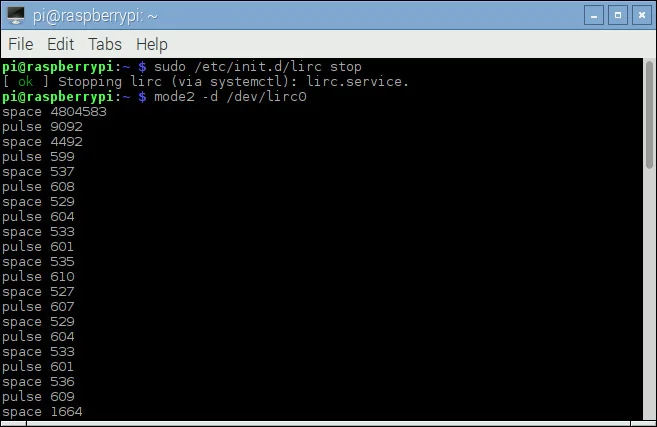
<13> Run these two commands to stop lircd and start outputting raw data from the IR receiver:
pi@raspberrypi ~ {0}nbsp; sudo /etc/init.d/lirc stop
pi@raspberrypi ~ {0}nbsp; mode2 -d /dev/lirc0
<14> Point a remote control at your IR receiver and press some buttons. You should see something like this:
[updated information and details]
please refer to the official website:
www.suptronics.com/Xseries.html